vue适用多页面应用。vue在工程化开发的时候依赖于webpack,而webpack是将所有的资源整合到一块后形成一个html文件 一堆js文件;如果想使用vue实现多页面应用,就需要对它的依赖进行重新配置,即通过修改webpack配置来让脚手架具备构建多页应用的能力。

本教程操作环境:windows7系统、vue3版,DELL G3电脑。
我们知道vue可以快速开发web单页应用,而且官方为我们提供了自己的应用脚手架vue-cli,我们只需要下载脚手架,安装依赖后就可以启动vue应用雏形。
这得益与webpack的依赖追踪,各种资源后缀的loader,以及相关webpack插件的强大功能。
然而有些时候,我们有多页面的开发需求,在这种情况下,我们可以为多页面构建相应的多个应用,比如通过vue-cli生成多个应用目录,但是这样一方面会多出很多重复的构建代码和样板代码,另外也会破坏应用的统一性,不便于维护。我们可以在vue-cli的基础上通过修改webpack配置来让脚手架具备构建多页应用的能力。
vue在工程化开发的时候依赖于 webpack ,而webpack是将所有的资源整合到一块后形成一个html文件 一堆 js文件, 如果将vue实现多页面应用,就需要对他的依赖进行重新配置,也就是修改webpack的配置文件.
下面主要详述Vue的多页面应用开发(MPA)
具体实现步骤
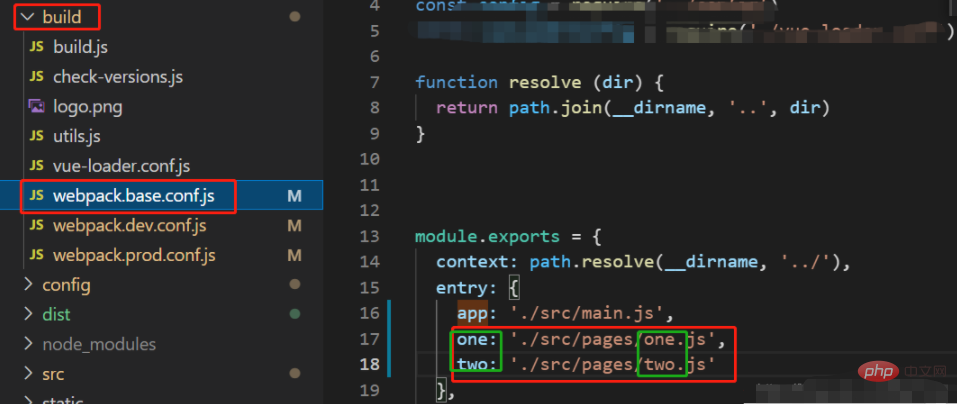
1、进入buildwebpack.base.conf.js目录下,在module.exports的域里,找到entry,在那里配置添加多个入口:

注意绿色框的修改和对应。
  entry: {     app: './src/main.js',     one: './src/pages/one.js',     two: './src/pages/two.js'   }
登录后复制
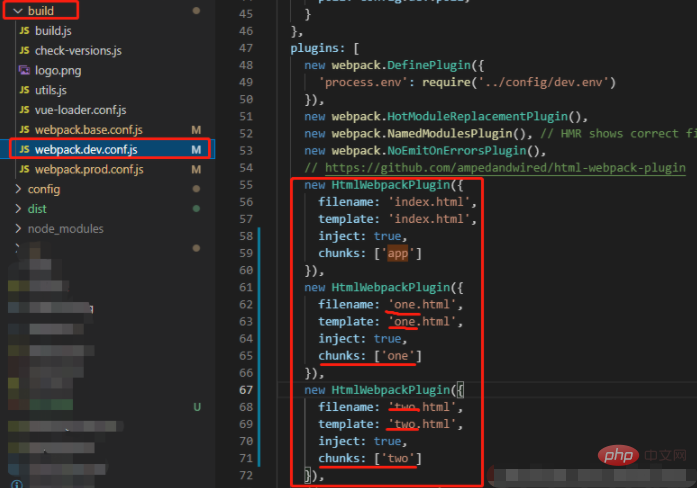
2、对开发环境run dev里进行修改,打开buildwebpack.dev.conf.js文件,在module.exports那里找到plugins,下面写法如下:

    new HtmlWebpackPlugin({       filename: 'index.html',       template: 'index.html',       inject: true,       chunks: ['app']     }),     new HtmlWebpackPlugin({       filename: 'one.html',       template: 'one.html',       inject: true,       chunks: ['one']     }),     new HtmlWebpackPlugin({       filename: 'two.html',       template: 'two.html',       inject: true,       chunks: ['two']     }),
登录后复制
说明:这里的配置比较重要 ,如果没写好的 在打包的时候就会报错了, 在chunks那里的app指的是webpack.base.conf.js的 entry 那里与之对应的变量名。chunks的作用是每次编译、运行时每一个入口都会对应一个entry,如果没写则引入所有页面的资源。也就是没有改项目配置前形成的单页应用。
3、之后就对run build也就是编译环境进行配置。首先打开configindex.js文件,在build里加入这个

    index: path.resolve(__dirname, '../dist/index.html'),     one: path.resolve(__dirname, '../dist/one.html'),     two: path.resolve(__dirname, '../dist/two.html'),
登录后复制
说明:这里也就是打包之后dist文件夹中形成的 html。
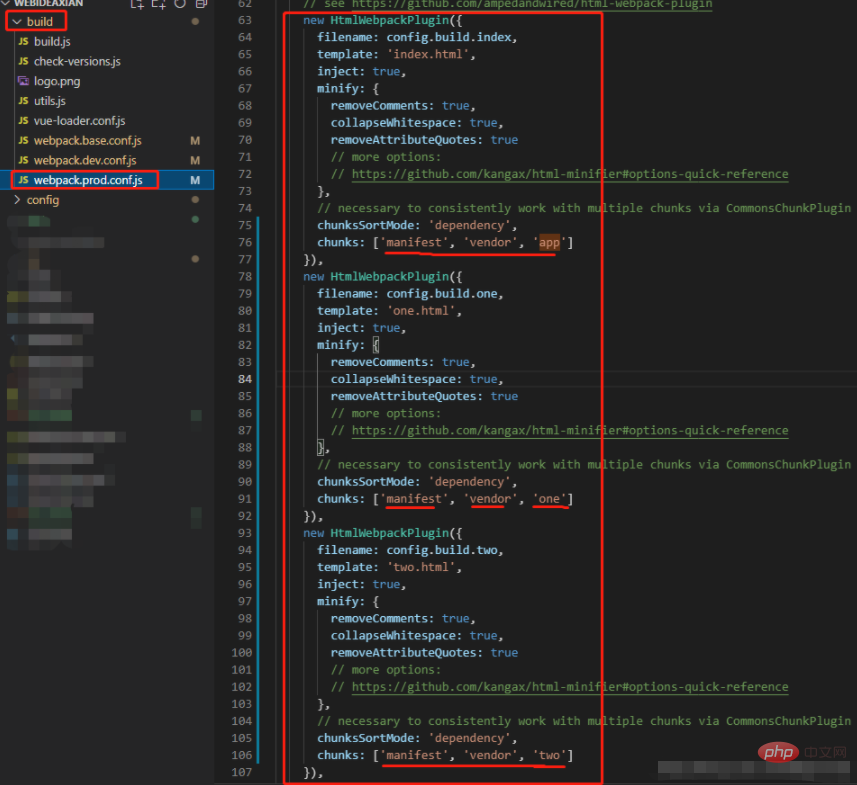
4、然后打开/build/webpack.prod.conf.js文件,在plugins那里找到HTMLWebpackPlugin,添加

 new HtmlWebpackPlugin({       filename: config.build.index,       template: 'index.html',       inject: true,       minify: {         removeComments: true,         collapseWhitespace: true,         removeAttributeQuotes: true       },       chunksSortMode: 'dependency',       chunks: ['manifest', 'vendor', 'app']     }),     new HtmlWebpackPlugin({       filename: config.build.one,       template: 'one.html',       inject: true,       minify: {         removeComments: true,         collapseWhitespace: true,         removeAttributeQuotes: true       },       chunksSortMode: 'dependency',       chunks: ['manifest', 'vendor', 'one']     }),     new HtmlWebpackPlugin({       filename: config.build.two,       template: 'two.html',       inject: true,       minify: {         removeComments: true,         collapseWhitespace: true,         removeAttributeQuotes: true       },       chunksSortMode: 'dependency',       chunks: ['manifest', 'vendor', 'two']     }),
登录后复制
说明:其中filename引用的是configindex.js里的build,每个页面都要配置一个chunks,不然会加载所有页面的资源。

1、one.js文件代码:(我这里是举例),two.js和这个代码类似,注意将“one”替换成“two”即可。
import Vue from 'vue' import one from './one.vue' Vue.config.productionTip = false /* eslint-disable no-new */ new Vue({     el: '#one',     render: h => h(one) })
登录后复制
2、one.vue文件代码:(我这里是举例),two.vue和这个代码类似,注意将“one”替换成“two”即可。
<template>     <div id="one">         <p>{{msg}}</p>     </div> </template>  <script>     export default {         name: 'one',         data() {             return {                 msg: 'I am one'             }         }     } </script>
登录后复制
3、one.html文件代码:(我这里是举例),two.vue和这个代码类似,注意将“one”替换成“two”即可。
<!DOCTYPE html> <html> <head>     <meta charset="utf-8">     <meta name="viewport" content="width=device-width,initial-scale=1.0">     <title>one-page</title> </head> <body>     <div id="one"></div> </body> </html>
登录后复制
注意!<div id="one"></div>中id的修改,之前忘记修改,页面空白无内容,打开控制台可以看到div标签中并无内容,且id是app我才反应过来,修改后就好了。
【
 站长资讯网
站长资讯网